

Most people treat their Tsubaki Hair Mask like a regular conditioner — a quick slather, a 60-second wait, and a rushed rinse. Then they wonder why their hair still feels dry.
Here’s the thing: this isn’t a basic conditioner.
The Shiseido Tsubaki Hair Mask is built around tsubaki camellia oil. This centuries-old Japanese beauty secret goes deep into the hair shaft. It doesn’t just coat the surface. But it needs the right conditions to do that job well.
Get the application wrong, and you miss out on real results. Get it right, and you’ll see the difference after a single use.
Below is the exact step-by-step routine that makes this Japanese hair mask perform the way it was meant to.
What Is Tsubaki Hair Mask and Why Does It Work Differently
Shiseido has spent decades perfecting this formula — and the difference becomes clear once you see what’s inside the jar.
The Tsubaki Hair Mask (the Shiseido Tsubaki Premium Repair Hair Mask , 180g) is a professional-grade deep conditioning hair treatment built around one star ingredient: Camellia Japonica Seed Oil.
That name matters. Here’s why.
Most conditioners work on the outside of your hair. They deposit a thin coating over the cuticle, create a temporary slip and shine, then wash away with your next shampoo. The results look good. They just don’t last.
Camellia Seed Oil works differently. Its molecular structure is very small — small enough to enter the hair shaft itself. It moves through the CMC (Cell Membrane Complex) and hydrates your hair from the inside out. The Tsubaki Premium Repair Mask pairs this oil with the brand’s latest CMC technology. Together, they do two things:
- Seal damaged cuticles to lock in moisture
- Hydrate the internal hair structure , not just the surface
The rest of the formula is just as deliberate. It stacks nine-plus humectants — Glycerin, Sorbitol, Acetylated Sodium Hyaluronate, Hydroxyethyl Urea — plus emollients, Lactic Acid for gentle exfoliation, Royal Jelly Extract, and Hydrolyzed Conchiolin Protein for structural repair.
This isn’t a one-ingredient wonder. It’s a layered system.
That layered approach is why technique matters. The formula is built to work with the right conditions — and that’s exactly what the steps below are set up to create.
Step 1 — Shampoo First to Open the Path for Absorption
 Clean hair isn’t just clean. It’s ready .
The Tsubaki Hair Mask needs a clear path to work. Your hair shaft has to be free of buildup before the mask can absorb excess sebum, styling residue, and environmental grime, all of which block it. Shampoo does that job. Surfactants in the formula loosen and lift impurities off the hair shaft, leaving nothing behind to interfere.
A few things worth knowing here:
- Apply shampoo to the scalp, not the lengths. Work from front to back in small sections. Piling product on top creates friction — and friction means tangles and breakage before you’ve even started.
- Rinse thoroughly. Leftover shampoo residue competes with the mask for absorption. A full rinse isn’t optional.
- Choose a mild, sulfate-free formula where possible. Harsh cleansers strip the hair too hard. You end up with staticky, rough strands — the exact opposite of what you need before a deep conditioning hair treatment.
After rinsing, pat your hair with a towel. Don’t rub it. Just pat. Wet strands are fragile and break easily. Rough drying creates frizz that you’ll spend the next steps trying to fix.
Hair that’s clean, a little damp, and tangle-free? That’s your starting point.
Step 2 — Towel-Dry to the Right Dampness Level
 Dampness level isn’t a minor detail. It’s the difference between a mask that works and one that doesn’t.
Here’s the science: freshly rinsed hair is swollen with an open cuticle — think fish scales lifted away from the shaft. That’s your prime window for active ingredients to go deep. Too much water left on? Those ingredients dilute before they hit the cortex. Wait too long? The cuticle starts closing again.
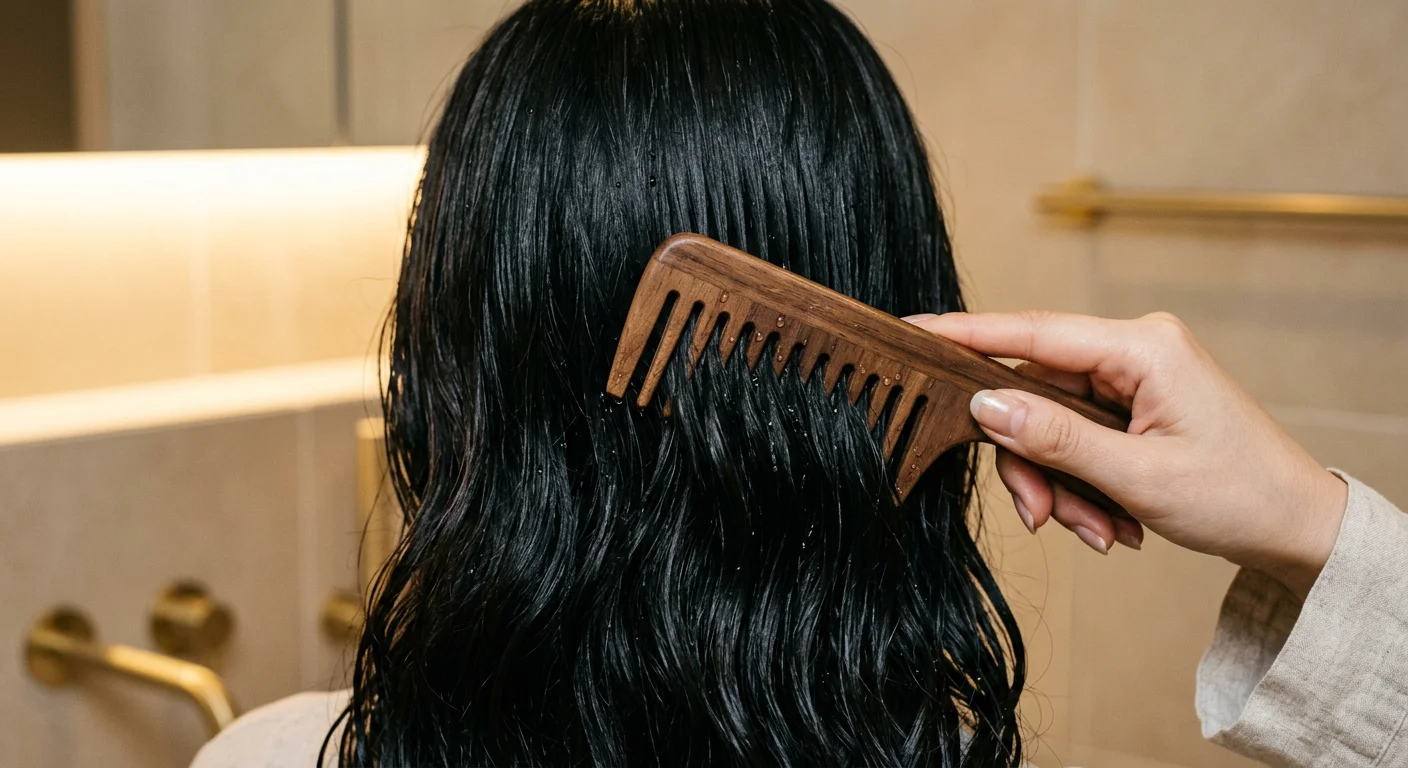
The benchmark is simple: no water droplets fall when you comb through . That’s your green light.
How to towel-dry the right way:
- Press hair from roots to ends — no wringing, no twisting
- Sandwich mid-lengths and ends between the towel and pat only
- Don’t drag the towel along the length — wet hair is at its weakest point, and friction causes real damage
Hit that damp-not-dripping state? Apply the mask right away. Don’t let hair sit and air-dry further. The open-cuticle window closes fast — and so does your best shot at real results.
Step 3 — Apply the Tsubaki Hair Mask the Right Way (Amount + Zones)
 Most of the damage happens here — not from neglect, but from habit.
People slap a palmful across everything, roots included. More product feels like more care. It doesn’t work that way. With the Tsubaki Hair Mask, where you put it matters just as much as how much you use.
How Much to Use Tsubaki Hair Mask?
Scoop out a modest amount and warm it between your palms first. That brief friction softens the formula and spreads it more easily. Then work from mid-shaft down to the ends — and stop there.
A simple self-check: hair feels heavy or greasy after rinsing? You used too much. Scale back next time. Does a small amount still cause that same reaction? The formula may not suit your hair type. For most people, though, the real issue is overuse — not a bad match.
For badly damaged ends, go heavier on that zone. Those tips have taken the most wear.
Where to Apply — and Where Not To
The scalp is off-limits. Not a suggestion — a rule. The camellia oil and concentrated nutrients in this deep conditioning hair treatment work on the hair shaft, not the follicle. Getting too close to the root can clog follicles, trigger excess oil, increase dandruff, and, over time, lead to hair loss.
The target zone for this Japanese hair mask routine:
- Ends — your top priority; driest, most damaged, needs the most product
- Mid-shaft — the secondary focus zone
- Roots and scalp — keep product away from here
Step 4 — Comb Through for Even Distribution
 Product piled in one spot does nothing for the rest of your hair.
Even after careful application, the mask tends to cluster. It sits heavier at the ends and barely reaches the middle sections. A wide-tooth comb fixes that. Start from the ends and work your way up in slow, deliberate strokes. No yanking. No rushing. Let the comb do the separating.
One pass does two things. It spreads the camellia oil hair mask across every strand. It also pushes the formula deeper into each damaged section — putting more of the product in direct contact with the hair shaft.
For curly hair, put the comb down. Use your fingers instead. Rake through section by section, with care. The curl pattern is structure — worth protecting.
One full comb-through is enough. Any more than that adds friction to wet strands that are already fragile.
Step 5 — Leave-On Time: 5 Minutes vs. 10 Minutes vs. Overnight
The timer matters more than most people realize. The right number isn’t the same for every head of hair.
Leave-on time isn’t random. It follows the physics of how ingredients move through the hair shaft. The Tsubaki Hair Mask needs enough time to push camellia oil past the cuticle layer and into the cortex. That threshold shifts based on how damaged your hair is.
Here’s how to read your hair and pick the right window.
5 Minutes — For Healthy or Lightly Stressed Hair
Healthy hair has a ceiling. Research using confocal Raman microscopy and fluorescent ceramide tracking found that undamaged fiber tops out at 7% cortical uptake. That ceiling doesn’t move, no matter how long you leave the mask on. Five minutes is enough to reach full surface absorption and diffusion on healthy strands. Staying longer adds residue, not results.
Your hair is in good shape — minimal heat styling, no chemical processing. Five minutes is your number. Rinse, and move on.
10 Minutes — For Moderately Damaged Hair
Two or three bleach sessions. Regular flat iron use. Color-treated strands that feel rough by day three. This is moderate damage — and it changes the math.
Damaged hair needs more time. The cortex is more open, but the ingredients still need a steady window to reach it. Studies show moderately damaged hair hits 23% cortical delivery with heat held at 42–44°C for a minimum of 12 minutes. Ten to fifteen minutes without added heat still beats a five-minute window on damaged fiber. The cuticle isn’t sealed shut — there’s a path in. Give the formula time to take it.
To get the most from this window:
- Wrap hair in a warm (not scalding) towel after applying the Tsubaki Premium Hair Mask
- Microwave your towel for no more than 15 seconds on medium power — test it on your inner wrist first
- Put the mask on before wrapping, not after — heat works on the product already touching the strand
- Keep the wrap on for the full duration. A towel drops below 42°C within 3–5 minutes, so layer a shower cap over it to hold the warmth longer
Overnight — For Severely Damaged or Chemically Processed Hair
Repeated bleaching, perms, relaxers — these leave the cortex in a different state. The natural barrier breaks down, which is why overnight use works here but wouldn’t on healthier hair. That same L’Oréal research recorded 38% cortical uptake on severely damaged fiber under the right conditions.
The steps matter, though. More product doesn’t mean more repair.
- Apply a thin layer — excess product sits on the surface without extra benefit inside the shaft
- Braid or twist hair loosely to cut down on friction and tangling overnight
- Wrap with a satin or silk bonnet — it shields the strand and holds body heat (~36°C). That keeps the cuticle flexible over a long stretch, even below the ideal 42°C
- Rinse well in the morning
Overnight use is for the hair shaft only — never the scalp. The camellia oil in this moisturizing hair mask routine works on the fiber, not the follicle. Long contact on the scalp raises the risk of clogged follicles and excess oil buildup. Keep the product on mid-lengths and ends, and you’re fine.
Quick reference:
| Hair Condition | Leave-On Time | Heat Recommended? |
|---|---|---|
| Healthy / minimal damage | 5 minutes | No |
| Moderately damaged | 10–15 minutes | Yes — warm towel |
| Severely damaged / chemically processed | Overnight (thin layer) | Body heat via silk bonnet |
Step 6 — Rinse Right to Lock In the Results
The rinse is where most people undo everything they just did.
Hot water feels good — but it forces the cuticle back open. That pushes out the camellia oil and humectants you spent the last 5 to 15 minutes pressing in. Keep the temperature between 32–38°C. Lukewarm. Comfortable, not warm. That range lets the cuticle close with the treatment sealed inside — not wash it out.
Rinse until the water runs clear. Not close to clear — all the way clear. Product left on the scalp turns into sebum buildup over time. Research also links poor rinsing to higher hair shedding over time.
One more thing: skip the conditioner after. The Tsubaki Hair Mask already has sealing agents built in. Adding a separate conditioner on top puts extra weight on your hair with no real benefit. Plus, it can break the seal you just worked to create.
Step 7 — Post-Tsubaki Hair Mask Styling Tips to Protect What You’ve Done
Everything you just did can unravel in the next ten minutes. Reach for the wrong tool, and it’s gone.
The hair repair mask is sealed in. The cuticle is closed. Your job now is simple: don’t break what you just fixed.
Start with your hands, not a brush. Finger-comb for the first 30 minutes after rinsing. A brush drags across strands that are still settling. That friction kills the smoothness before it gets a chance to hold.
Heat Is the Biggest Threat Right Now
Air drying keeps 95% of the repair work intact. Low-heat drying — under 120°F — holds 80–85%. Go past 180°F, and you wipe out 60–70% of the conditioning agents still bonding to your hair shaft. Two to five minutes at 200°F cuts the mask’s effectiveness by half. That’s protein breakdown doing the damage.
The smart move: air dry to 80%, then finish with a diffuser set to 100°F maximum for no more than five minutes. You get 90% retention — nearly as good as full air drying, without the wait.
Layer the Right Products in the Right Order
Using other Tsubaki products? Order matters:
- Leave-in serum — 2 to 3 pumps on mid-lengths and ends right after rinsing; boosts retention by 35% over 72 hours
- Tsubaki Oil-In Cream — 1g per section after styling; works with the Tsubaki hair mask chemistry to give you 50% more anti-frizz protection
The sequence is fixed: mask → rinse → serum → low-heat styling . Flip any step, and the layering effect breaks down.
Finish with 0.5ml of a sheer oil or serum to seal the surface. Skip it, and you drop about 20% of the effectiveness you built up.
What to Expect — and When
The results are not vague. They show up in specific ways:
| Effect | What You’ll Notice | How Long It Lasts |
|---|---|---|
| Smoothness | 40% less friction to the touch | 24–48 hours |
| Shine | 30% more light reflectance | 12–24 hours |
| Frizz control | 65% less humidity frizz at 70% RH | 24 hours |
Stick to this routine once or twice a week. At four weeks, smoothness goes up by 25%. At eight weeks, your frizz baseline drops 40%. Full repair for color-treated or chemically processed hair takes six to twelve weeks. But you’ll feel the difference after just one session — that part is real.
How Often Should You Use Tsubaki Hair Mask?
Frequency is where most routines fall apart.
Use this Tsubaki Hair Mask too often, and fine hair turns limp. Not often enough, and damaged strands never get the repair they need. The right number depends on what your hair is dealing with right now.
Here’s the breakdown:
- Dry, damaged, or color/heat-treated hair (bleached, colored, heat-styled each day): 2–3 times per week
- Normal hair: 1–2 times per week
- Fine or oily hair: Once a week , or as needed
Tsubaki treats this as a special treatment — not an everyday step. On days you skip the mask, pair your wash with the Tsubaki Premium EX Conditioner instead. That rotation keeps your hair nourished. It also stops you from overloading it.
One more thing worth knowing: even a quick rinse delivers results. Leaving it on longer is a bonus — not a requirement.
Common Mistakes That Kill Your Results (+ How to Fix Them)
Even the right product fails in the wrong hands. With the Tsubaki Hair Mask, a few small habits can cancel out everything this formula was built to do.
Here are the most common ones — and how to fix each one.
Mistake #1: Applying to soaking-wet hair
Dripping hair dilutes the formula before it reaches the shaft. The camellia oil hair mask needs damp strands — not a waterfall. Fix: towel-press until no drops fall, then apply right away.
Mistake #2: Using Tsubaki Hair Mask like a rinse-out conditioner
A 60-second wait is a conditioner move. This is a deep conditioning hair treatment — it needs time to work past the cuticle. Cut the leave-in time short, and you’re treating the surface only. Fix: follow the timeline for your hair type. Five minutes minimum. Ten if there’s any damage.
Mistake #3: Applying all the way to the roots
It feels thorough. It isn’t. Product near the scalp clogs follicles, builds up excess oil, and works against healthy growth over time. Fix: mid-shaft to ends, every time. The scalp takes care of itself.
Mistake #4: Rinsing with hot water
Hot water feels like a reward. What it does is force the cuticle back open — pushing out the treatment you just spent ten minutes pressing in. Fix: rinse at 32–38°C. Lukewarm locks the seal.
Mistake #5: Piling on conditioner afterward
The T subaki Premium Hair Mask has sealing agents built in. Adding conditioner on top doesn’t double the benefit — it breaks the bond and weighs hair down. Fix: skip the conditioner on mask days. The formula handles it.
Small adjustments. Real, noticeable results.
FAQ: Your Top Questions About Tsubaki Hair Mask Answered
 These questions come up all the time — and they deserve straight answers.
Is a hair mask the same as a conditioner?
Not even close. A conditioner coats the outside of the hair shaft and rinses off in 2–5 minutes. A deep conditioning hair treatment like the Tsubaki Hair Mask works through the CMC (Cell Membrane Complex) to seal the cuticle from within. That takes 15–20 minutes. Different job. Different depth. Don’t swap one for the other.
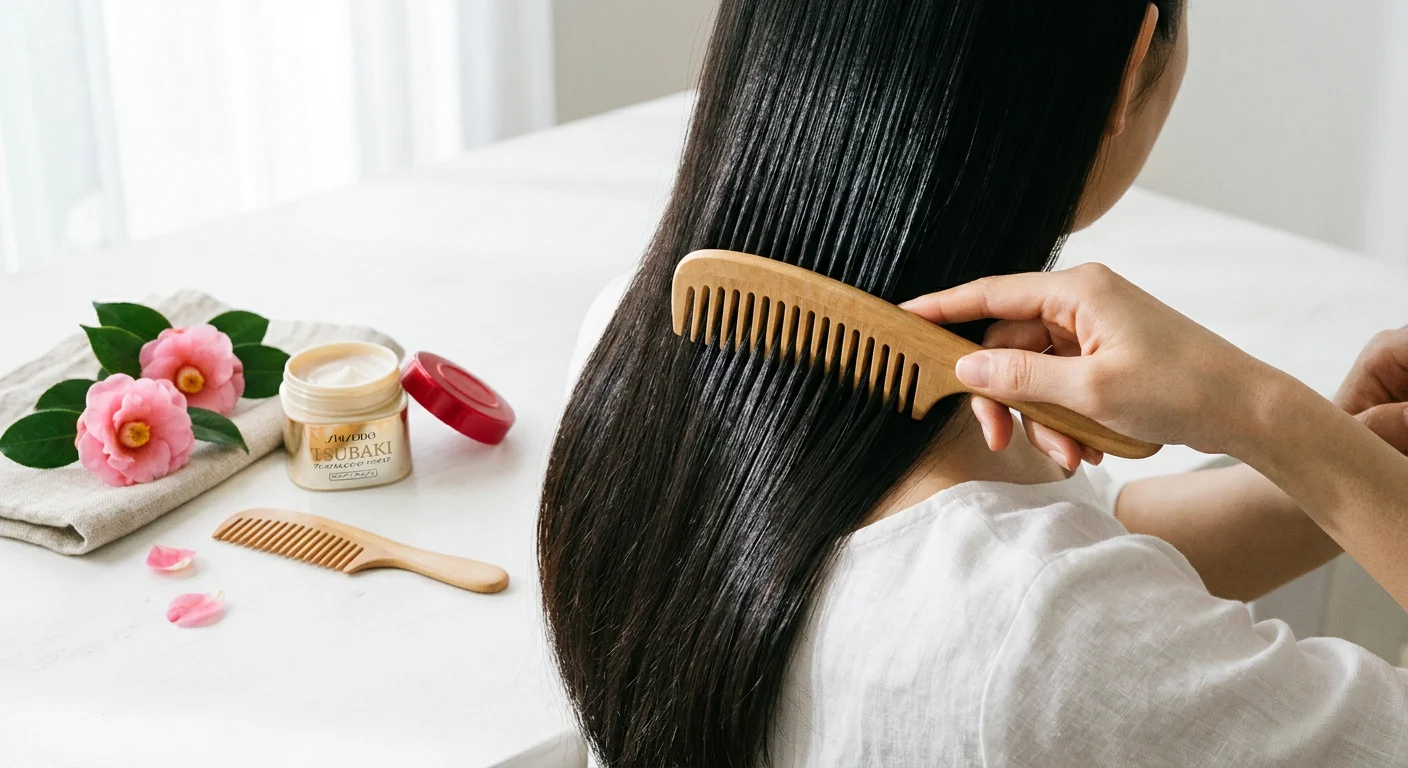
What’s the difference between the red Tsubaki and the gold?
The Shiseido Tsubaki Premium Repair Mask (red) is built for damaged hair. Dry strands, split ends, anything that needs real structural work — this is the one. It contains 35 ingredients: CMC technology, pearl protein, royal jelly, acetylated sodium hyaluronate, and camellia seed oil.
The gold (Premium Ex Repair) is for healthy hair that just wants more gloss and smoothness. Its formula is lighter, built around hydrolyzed conchiolin protein and camellia oil.
- Is hair struggling? Go red.
- Just need a shine boost? Go gold.
Can I use it if I have an oily scalp or sensitivity?
Yes — but follow one firm rule: apply it to mid-lengths and ends. Keep it away from your scalp. The camellia oil hair mask formula was never made for scalp contact. On an oily scalp, product residue near the root speeds up buildup and throws off your natural oil balance.
Sensitive to preservatives? The formula contains phenoxyethanol. Do a 24-hour patch test on your inner arm before full use. That’s the smart move.
Where’s the best place to buy it — and how much should I pay?
For the 180g tub, here’s what to expect:
- Amazon: $15–25 USD. Check for Shiseido’s hologram seal and pick sellers with 95%+ ratings.
- Official retailers like Strawberrynet: $18–22 USD.
- Sourcing from Japan (e.g., Matsumoto Kiyoshi): Around ¥800–1,200 JPY (~$5–8 USD).
No matter where you buy, match the ingredient list and scan the batch code. Fakes are out there.
Conclusion
Your hair doesn’t need a miracle — it needs a method.
The Tsubaki Hair Mask works because camellia oil speaks a language your hair already understands. It’s lightweight, penetrating, and compatible with the hair shaft in a way most Western masks aren’t. Even the best Japanese hair mask routine falls flat without consistency — right dampness, right zones, right timing, right rinse.
Seven steps. Ten minutes. Once or twice a week.
That’s all it takes to shift your hair from surviving to thriving.
So here’s your next move: drop the guesswork. Pick your wash day. Run through the full routine as outlined — just once. Notice how your hair feels when it dries. That single session will tell you everything.
Because good hair isn’t lucky. It’s practiced.