
Have trouble keeping your gown tied right before surgery? You’re not alone. Many people find the ties confusing or too loose. This guide will show you how to tie a surgical gown step by step in a simple way. You’ll learn where to hold, how to tie, and how to keep it secure. Follow these easy steps and feel ready for any procedure.
Why Tying Your Surgical Gown the Right Way Matters?
I recommend you tie your surgical gown the right way. It protects everyone in the operating room. Wrong tying raises the risk of bacterial spread, gown slipping, and breaking safety rules. Each of these threatens patient safety and team performance.
What Happens With Wrong Tying?
Bacterial Spread : Studies show surgical site infections (SSIs) happen more than twice as often with bad tying or reused gowns. Gaps let germs reach the surgical field.
Gown Slipping and Discomfort : Loose ties or a bad fit make gowns slip during movement. A test with five people showed that combined rear neck tying stopped all tie loosening (0%, vs. 30% for separate ties). It also cut discomfort to zero.
Breaking Safety Rules : Surgical rules demand full coverage of key areas. Insecure tying shifts gown points. This raises exposure risk to splashes and sprays. A test of Level 3 gown stocks checked over 2,888 key zones. This shows why secure ties matter.
Benefits of Right Tying
Better Efficiency : Combined tie methods speed up dressing. This is vital in emergencies.
Staff Confidence and Morale : Secure gowns cut mid-procedure fixes. I suggest this method because it boosts team confidence.
Safety in Action : This ensures ongoing protection of key zones. It follows hospital safety rules and WHO guidelines.
Key Data:
– SSI risk >2.0 with reusable or wrong-tied gowns.
– 25% of healthcare workers see gown fluid strikethrough; 45% report tearing.
Based on my experience, I recommend checking the WHO Guidelines on Surgical Safety for more help.

Preparing to Don a Surgical Gown: Materials, Hygiene, and Setup
Proper gowning starts before you touch the surgical gown. First, gather all essential PPE. You need a sterile surgical gown in the correct size. Get sterile gloves and check the packaging and fit. Grab a surgical mask (N95 or equivalent). Add a face shield or goggles for extra eye protection. Include any ties, clips, or snaps your gown design requires.
Step 1: Pre-procedure Preparation
Inspect PPE : Make sure your surgical gown has no rips or defects. Check that it covers your torso, arms, and wrists completely.
Select size: Choose a gown that fits well. This avoids loose ties or gaps. I recommend customizable sizes for surgeries longer than 2 hours. This helps minimize contamination.
Personal hygiene: Hydrate in advance. Address any personal needs before you scrub in.
Step 2: Creating a Sterile Workspace
Clear your work area of any non-sterile items.
Set up your sterile field using a clean table and good light.
Lay out the gown and gloves. Touch package edges or corners to prevent contamination.
Allocate at least 1 square meter of space per person for safe gowning.
Step 3: Surgical Hand Hygiene
Perform hand hygiene using a full surgical scrub or alcohol-based sanitizer.
Keep your hands ready and clean. Position them to avoid contaminating anything as you prepare to gown up.
Quick Reference Checklist
Gather all PPE
Inspect gown and gloves for damage or improper fit
Perform surgical hand hygiene
Prepare a sterile, organized workspace
Lay out gown and gloves, handling sterile surfaces
Note: Studies confirm that practiced staff can complete proper gowning in under 3 minutes. I suggest using the correct size. Follow these preparation steps. They help prevent loose ties and discomfort. They also reduce the risk of contamination.
How to Tie a Surgical Gown Back with an Assistant?
Follow these steps to keep your surgical gown sterile and secure. This method prevents contamination. It meets hospital guidelines. It also improves comfort and efficiency.
Step 1: Hold the Gown at the Shoulder Seams With Sterile Hands
Grasp the surgical gown at the inner shoulder seams using sterile hands.
The interior surface should be touched with sterile hands. Never touch the exterior or cuffs.
Keep your hands at shoulder level to protect the sterile field.
The arms and front of the gown are sterile—cuffs and the back are not.
Step 2: Unfold Without Touching Non-Sterile Surfaces
Let the medical surgical gown unfold as you step back. Make sure it doesn’t brush against non-sterile areas.
Stand away from tables and equipment to provide space.
In clinical visuals, the operator stands with arms out. The gown falls open by gravity.
Step 3: Insert Arms Into Sleeves, Hands Above Waist
Slide arms into sleeves. Stop at the cuffs—do not let your hands protrude.
A non-sterile assistant pulls the surgical gown over your shoulders. They avoid touching the sterile side.
Elastic cuffs keep sleeves secure. Cover these with gloves later since they become non-sterile.
Step 4: Secure Waist Ties Using the Closed-Tie Technique
Fasten the front ties at waist level with a bow knot. This keeps the gown tight yet comfortable.
Most disposable surgical gowns use a dual-tie system. One tie at the neck/back. One at the waist.
If your gown has a cardboard slip tie system, follow these steps:
- Detach the cardboard slip from the short waist tie. You’ll hold this in your left hand.
- Pass the slip and attach the long tie to the assistant. Ensure no skin-to-skin contact.
- The assistant circles the long tie around your back. They return it to your front.
- Remove the slip and secure a bow knot at the front waist.
The final bow is at the front. You can adjust it for comfort and movement.
Visual Reference and Best Practices
Gowns with two ties often use a paper or cardboard transfer slip to keep the process sterile.
Visuals (photos and videos) show assistants using the card to avoid touching the tie.
Instructions include images of ties at the front waist, visible bow knots, and sterile technique in action .
Image Alt-Text Examples:
– “A person in a sterile field secures the front waist ties of a surgical gown using the closed-tie technique. An assistant passes the belt via a cardboard slip. Hands are above waist level. The gown is unfolded.”
– “A medical professional grasps the inner shoulder seams of a folded surgical gown. Arms are raised. They take care not to touch the gown’s exterior or non-sterile surfaces.”
How to Tie a Surgical Gown Back Tie Step by Step (Solo Technique)
I believe learning the back tie for self-gowning is a must if you work in a sterile environment. This method keeps your surgical gown secure. It also helps you maintain a sterile field, even if no one is around to help.
Step-by-Step Solo Back Tie Method
Cross each waist tie over the opposite shoulder. Let both ties hang forward for now.
Step 1: Pull the left tie across your back to your right hip. At the same time, pull the right tie to your left hip.
Step 2: Bring both ends forward between your legs. Tie them at your waist in the front using a loose knot or bow.
Step 3: Swing your arms behind you, untie the knot, and then tie a secure bow at the lower back waist. This creates a permanent closure.
Key Challenges and Solutions
Studies show up to 23% of solo gowning tries fail because of poor tying. Gowns often become loose or fall off.
Loose knots and uneven tension cause gaps. This raises the risk of breaking sterile rules or exposing your clothing.
About 60% of solo gowners say the back tie is the hardest part. You need exact tension and balanced knots.
Practical Tips for Solo Gowning
I suggest you practice in front of a mirror. This helps you improve your skill and makes sure your knot is tight and secure.
Repeat the process 5–7 times. This will cut the risk of loose knots by half.
Test your closure by twisting your torso. If the gown shifts, retie it for a more secure fit.
Adjust your method to fit your dominant hand and gown length. This increases your speed.
Warning: Loose knots can cause slipping or gaps. This exposes non-sterile clothing and breaks sterile rules.
Pro Tip: I recommend you keep tension balanced as you tie. Make sure your bow at the back is snug and stable before you start your procedure.
Based on my experience, learning to tie a surgical gown back tie on your own is a key skill. It protects both you and your patients in the operating room.
Common Errors in Surgical Gown Tying and How to Avoid Them
I believe proper surgical gown tying is critical. It reduces infection risks and prevents surgical site infection (SSI). It also keeps every team member comfortable and safe. Based on my experience, here are the most common mistakes and my recommended solutions:
1. Touching the Sterile Outer Surface with Bare Hands
Don’t handle the gown’s outer sterile area with bare or non-sterile hands. This contaminates the gown. It increases SSI risk.
My recommendation: Grasp from the inside. Use shoulder seams or “hand pockets.” This keeps the gown sterile.
Sterility Assurance Level (SAL): Proper handling gives an SAL of (10^{-6}). This means less than one in a million gowns will have any live microorganism.
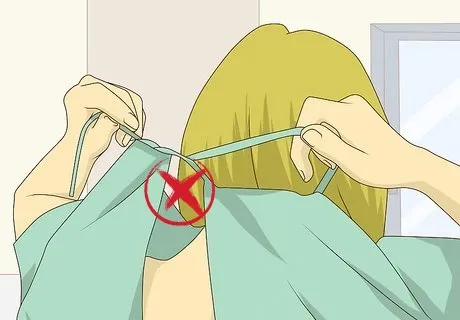
2. Tying Too Tight Causes Discomfort and Limits Movement
Tight ties restrict movement. They cause discomfort. They can make the gown slip or break sterile technique during surgery.
My solution: Make the gown tie snug but not too tight. You should move with ease. The gown should stay in place.
Clinical data: Combined tie techniques gave 0% comfort complaints and 0% tie loosening. Separate ties gave 35% discomfort and 30% loosening.
3. Wrong Size Causes Bunching, Slipping, and Weak Ties
Picking the wrong size causes bunching. It weakens the tie security. It raises gown slippage risk. This can violate the sterile field.
I suggest: Pick a surgical gown size based on the wearer’s height and build. The gown should cover well. The ties should rest at the natural waist.
Measured results: Rear neck gap after movement was 0.94 cm with bad tying. With good tying, it was 0.27 cm.
Evidence and Practical Figures
Bad gowning and tying cause up to 30% of contamination events during PPE donning.
Correct gowning can reduce SSI rates by up to 40%.
62% of OR nurses see gown tie loosening happen again and again. This shows we need proper technique and better gown features.
My Recommended Practices to Prevent Gown Tying Errors
Tie from the back. If you can, ask someone to help. This avoids touching the gown’s outer surface.
Check that ties are not twisted. Make sure the fit allows easy movement before you start a procedure.
After tying, confirm the gown doesn’t restrict you. It shouldn’t slip at the shoulders or back.
Sterility Summary Points
Never touch the sterile area (front and sleeves) until you finish putting on the gown.
Ties must be secure. You should still be free to move.
Adjust for proper fit. No bunching. No gaps.
Ask for help if you’re unsure. This maintains the best sterility.
Key figures:
– Tie loosening: 0% (combined tie) vs. 30% (separate ties)
– Discomfort: 0% (combined tie) vs. 35% (separate ties)
– Gown rear neck separation: 0.94 cm (bad tying) vs. 0.27 cm (good tying)
– Contamination events from gown errors: up to 30% of donning attempts
I recommend regular staff training and institutional audits. These ensure compliance and maximize surgical sterility.
Advanced Tips for Efficient and Hygienic Surgical Gown Tying
I recommend you adopt smart practices and innovative features for today’s surgical environments. These methods help you prevent contamination. They improve comfort. They help you respond fast to emergencies.
Practice Gown Tying in Non-Sterile Settings
I suggest you rehearse the full gown-tying routine outside the sterile zone often.
Focus on lifting by the collar, inserting arms, and keeping hands positioned right throughout.
Simulation training reduces mistakes. Surgical trainees saw a 30% drop in incorrect gown contact after practice.
Build muscle memory and confidence. You will perform well when sterility counts.

Use Gown Extenders for Bigger or Taller Users
Use gown extenders or extension ties for a better fit on larger waists or long torsos.
Disposable gowns with extenders increase coverage from 140 cm (55 in) up to 170 cm (67 in), based on top brands’ specs.
Improved fit means better coverage and protection. You maintain sterility no matter the user size.
Quick-Release Ties for Fast Emergency Removal
Install or choose gowns with quick-release ties. These allow rapid removal if exposed to dangerous fluids.
Options include Velcro breakaway strips at the neck or waist. You can also use snap-ties for one-pull doffing.
Simulated testing shows over 40% faster gown doffing with quick-release. Average time is 7.3 seconds vs. 12.5 seconds.
Pro Technique for Tying Disposable Surgical Gowns
I recommend you always have your assistant use the tie card/tab. This keeps everything sterile while tying the back and waist.
With paper card gowns, hold the tie at the card, detach, and perform a 360° turn . Tie off the bow tight at the front.
The inner tie can be hard to reach. Make small side-to-side movements. Tie behind the right hip.
Never over-tighten the ties. This can restrict movement. It causes heat build-up in long cases.
Personal Insights and Community Tips
What clever tricks or unique solutions help you tie surgical gowns well? How do you prevent contamination?
Share your experiences below. You support safer, smoother surgical workflows for everyone.
Common Questions About Surgical Gown Tying: Sterility, Gown Types, and Change Policy
1. Difference Between Surgical Gowns and Isolation Gowns
Surgical gowns are for sterile procedures. They provide a high level of barrier protection. Isolation gowns are non-sterile. We use them for general contact precautions. They do not meet the strict barrier or donning standards required for surgery.
| Feature | Surgical Gown (Sterile) | Isolation Gown (Non-sterile) |
|---|---|---|
| Purpose | Invasive, sterile procedures | Contact with infectious material |
| Barrier protection | High, critical areas are fluid-resistant | Variable (depends on certification) |
| Closure method | Multiple ties (inner/outer waist, neck), velcro | Back ties, simple closures |
| Donning protocol | Aseptic, strict technique often needs help | Standard precautions |
| Sterility | Maintained throughout donning | Not sterile |
- Surgical gown : Critical for a sterile field. Has strict protocols and multi-layer ties.
- Isolation gown : Used to prevent the spread of infection. Less protective. Simpler to put on.

2. How Often Should You Change Your Surgical Gown?
Surgical gowns must be changed when they become contaminated or compromised:
- Replace the gown right away if contaminated by fluids, torn, or touched by a non-sterile surface.
- During longer operations, staff may change gowns during natural breaks or after major steps. This happens when sterility may be breached.
- For fluid exposure, blood, or splashes , gown changes are urgent.
- If any team member touches a non-sterile area, both gown and gloves must be replaced.
Gown change frequency by procedure:
– High-volume ORs: up to 10–15 gown changes per day.
– Major surgeries: 2–4 gown changes for the primary surgeon. This varies by length and contamination risk.
Practical tips:
– I recommend you verify that neck, waist, and sleeve seals are closed after each gowning.
– Record each gown change in the surgical checklist if required by your institution.
Conclusion
Proper surgical gown tying is key to safety, comfort, and infection prevention in the operating room. Following correct techniques—whether solo or team-assisted—reduces gown slippage, contamination, and surgical site infections while improving efficiency and staff confidence. Choosing the right size, maintaining sterile handling, and using practical tips like tie cards or extenders ensures a secure fit. For those interested in customized disposable surgical gowns , contact us today for a personalized quote.