
It only takes one small mistake to turn a clean workspace into a contamination zone. Many workers don’t realize how much proper gear handling matters until it’s too late. Whether you work in healthcare, labs, or construction, learning the right way to use Disposable Coveralls can make all the difference. Let’s break down the simple steps to stay safe and compliant every time.
Importance of Correctly Wearing Disposable Coveralls
According to NIOSH, something as simple as putting on and taking off a disposable protective coverall correctly can prevent nearly one in five workplace contamination incidents. It’s one of those things that sounds minor—until you realize how much cleaner and safer it keeps the environment. Getting the “donning and doffing” part right isn’t just a box to check; it’s a real safeguard for both compliance and personal safety.

Why Wearing Disposable Coveralls Properly Matters
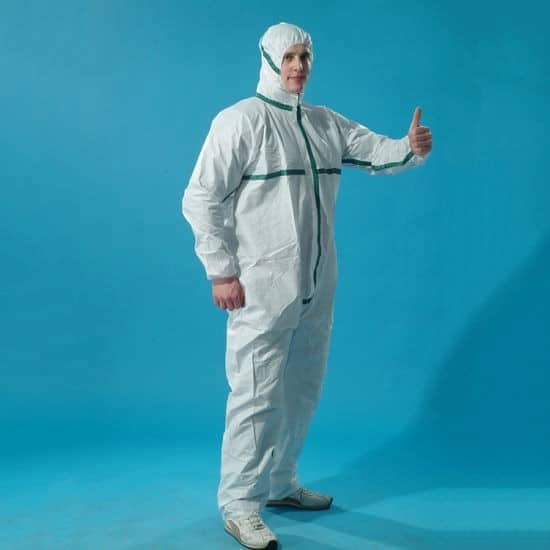
Full-body coverage: A good pair of coveralls shields your arms, legs, head, and even your shoes from exposure. It’s like a second skin that takes the hit so you don’t have to.
Barrier protection: They’re designed to block liquids, dust, and fine particles—everything from stray droplets to chemical splashes.
Prevents cross-contamination: Because they’re single-use, you toss them after each task. That’s especially important in patient care, cleanrooms, or food prep areas where even small residue can cause big problems.
No laundry hassles: You always start with fresh gear, which eliminates the risk of reusing something that wasn’t fully decontaminated.
Better overall safety: Studies suggest that proper training and use of disposable coveralls can cut workplace risks by roughly 37%. Not bad for something that’s often overlooked.
Preparing to Put On Disposable Coveralls
I usually tell people: before you even think about zipping up your disposable coveralls, take a few minutes to prep. It may feel like overkill, but skipping these small steps is exactly how contamination sneaks in. Whether you’re searching for disposable coveralls near me or using disposable PPE coveralls on-site, these preparation steps apply to every setting — good preparation makes all the difference.
Steps to Take Before Putting On Disposable Coveralls
Pick the right size. It sounds obvious, but fit really matters. A suit that’s too tight can split when you bend or stretch, while one that’s too loose can snag or trip you. One study even found that most lab exposure incidents start with — you guessed it — a poor fit.
Inspect for damage. Hold the coverall up to the light and check for holes, tears, or bad zippers. Around 6% of clinical-use suits get tossed for visible flaws, so catching those early saves you trouble later.
Lay out all your gear. Have everything ready — inner and outer gloves , boot covers , face and eye protection, and your mask or respirator. Scrambling mid-way through is how people forget steps.
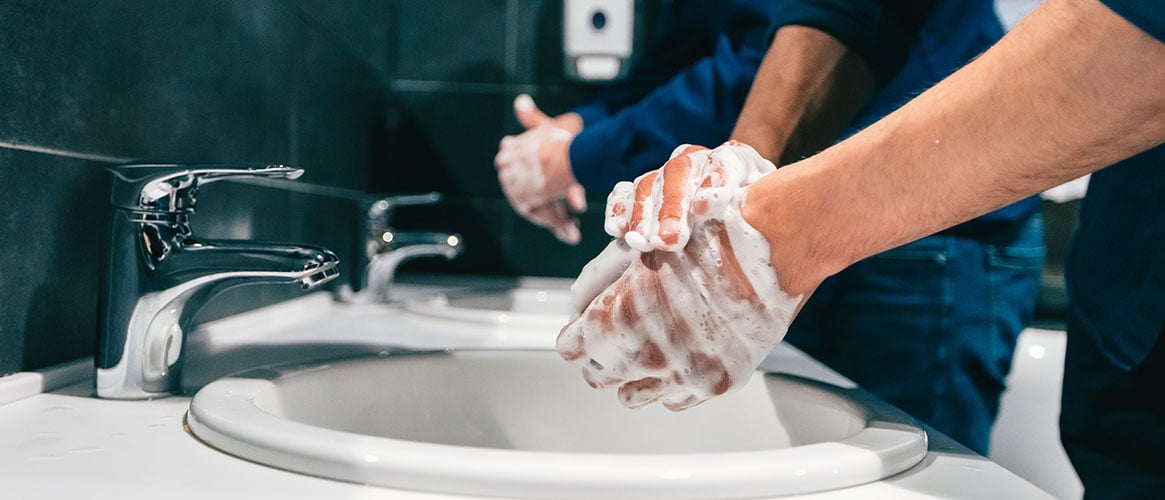
Wash your hands — really wash them. A quick rinse doesn’t count. Give it at least 20 seconds. Missing this step is one of the biggest risk multipliers.
Remove jewelry and electronics. Rings, watches, and even earbuds can break a seal or tear fabric without you noticing.
Pre-cut your tape. If you’ll be sealing gaps (common in chemical or infectious work), cut your chemical-resistant tape ahead of time. You’ll thank yourself later when you’re gloved up and can’t find the scissors.
Put on base layers first. Scrubs, inner gloves, and foot covers go on before you step into the coverall. It’s a smoother, cleaner process.
Find a buddy if you can. Having an observer sounds formal, but data shows they catch more than 40% of donning errors in high-risk settings. Basically, two sets of eyes are safer than one.
Quick Prep Checklist
-
Right size, no visible damage
-
PPE and supplies laid out
-
Hands washed thoroughly
-
No jewelry or personal devices
-
Tape pre-cut
-
Base layers on (scrubs, inner gloves, foot covers)
-
Trained observer present
Step-by-Step Process to Put On Disposable Coveralls
Putting on a disposable safety coverall the right way might not seem like a big deal, but it’s one of those steps that quietly determines how safe you really are. Whether you’re using them in a clinic, a factory, or a food-handling line, the method matters just as much as the material. It’s the difference between feeling protected and actually being protected.
If you’re stocking up—say, buying disposable coveralls in bulk for workplace safety or trying to find affordable options for daily use—don’t assume cheaper gear automatically means weaker protection. The real deciding factor is how carefully you put it on.
Step-by-Step Guide to Donning Disposable Coveralls

Start in a clean area.
Change only in a clean, designated space. Even minor contamination in the room can undo your efforts before you begin.
Footwear first
If you’re using separate boot covers or boots, put them on before stepping into the coverall. For integrated booties, tuck them inside your outer footwear so they don’t bunch up later.
Step into the coverall
Unzip it completely, unfold it, and step in one leg at a time. Pull it up to your hips carefully—don’t rush this part. Sitting down can help you balance if the floor or suit is slick.
Sleeves and arms
Slide each arm into the sleeves and pull the material up over your shoulders. If the coverall includes built-in gloves, make sure they fit snugly without stretching the fabric.
Zip and seal
Close the zipper from chest to neck, smoothing the material as you go. Then fasten any extra flaps or adhesive strips to keep contaminants out.
Add the hood (if there is one)
Pull the hood up so it fully covers your hair and sits comfortably around your face. Adjust gently so you don’t disturb your mask or goggles.
Gloves and final PPE layers
Gloves go on last. Pull the sleeves down over your wrists, then tuck them under the glove cuffs to create a seal. In high-contamination zones, double-gloving is strongly recommended—it adds a layer of insurance for when you remove the suit later.
Final check
Look over the suit: wrists, ankles, hood, waist. Everything should be secure but not constrictive. Double-check the zipper and any flaps. No skin should be visible at the neck, wrists, or ankles.
Tips for Safe Donning and Full Coverage
Always glove up after sealing your sleeves. It’s a small detail, but an easy one to miss.
When possible, have a trained observer watch the process—error rates drop by about 40% that way.
Avoid touching your face or adjusting your disposable coveralls once they’re on. Every extra touch increases contamination risk.
If you need to sit while dressing, do it—balance issues are more common than people admit.
Double-gloving isn’t just a hospital trick; it’s valuable in manufacturing and chemical-handling too.
Common Donning Risks (and How to Avoid Them)
Hotspots for contamination: wrists, neckline, and zipper area. Always recheck these before you start work.
Timing: Experienced users usually take 3–5 minutes to don properly. If you’re new to it, take your time—speed only helps when you know the motions by heart.
Training gap: Most exposure incidents aren’t about bad equipment—they’re about small procedural lapses.
Donning Checklist
-
Footwear on (boot covers or boots)
-
Stepped into coveralls and pulled them to the hips
-
Arms inserted, zipper closed to the neck.
-
All flaps and seals fastened.
-
Hood on and adjusted
-
Gloves on last; sleeves tucked underneath
-
Elastics and seals secure
-
Final gap check complete
Step-by-Step Guide to Safely Remove Disposable Coveralls
Taking off your disposable coveralls the right way is just as important as putting them on. If done incorrectly, you can end up contaminating yourself and spreading harmful materials in the workplace. In fact, OSHA points out that improper PPE removal is a top cause of contamination incidents. Studies show that a staggering 70% of self-contamination errors occur during the doffing process. But with the right steps, you can safely remove disposable FR coveralls, hooded coveralls , or even paint coveralls without leaving any trace.
Preparing for Safe Doffing
Pick a clean space: Always choose an anteroom or clean area, away from any contaminated zones, for removing your coveralls.
Use only gloved hands for contact: Your gloves should be the only part of you touching the outside of the coverall.
Clean your gloves or boots if dirty: If your gloves or boot covers are visibly soiled, wipe them down with disinfectant wipes before you start.
Step-by-Step Coverall Removal Procedure

Unzip the Coverall
Unzip the coverall completely, taking your time. If there’s a flap, carefully peel it open with one hand. Don’t touch your face or bare skin during this step—it’s easy to forget in the moment.
Remove the Hood First
Start with the hood. Gently roll it back from your head. Be sure the outer surface never touches your skin or hair. This step is especially critical when working with disposable hooded coveralls.
Roll Off Sleeves and Upper Body
Slide your gloved hands inside the sleeves at the shoulders. Carefully roll the sleeves off your arms, turning them inside out as you go. This traps contaminants inside and keeps your skin away from the exterior surface.
Remove the Lower Body
Next, roll the suit down your torso, hips, and legs—again, inside out. Sitting down while doing this can give you better balance. Carefully remove your boot covers and the lower section, ensuring you don’t spread debris in the process.
Take Off the Coverall
When you’re at the final stage, take one leg out at a time. As you pull the coverall off, make sure your clean skin or clothing never touches the outside of the suit. Keep rolling it inside out as you go; this method can reduce contamination by up to 90% according to DuPont data.
Handle and Dispose Properly
Only touch the inner (clean) surface of the coverall when discarding it. Dispose of the used coveralls in a sealed hazardous waste bag or biohazard container, following workplace and local guidelines. If contaminated, incinerate the suit; if not, it can be regular waste.
Remove Gloves Last
Use the glove-in-glove method: Peel off one glove inside out, hold it with the gloved hand, then slide a finger under the cuff of the second glove and remove both at the same time.
Finish with Hand Hygiene
Finally, wash your hands thoroughly with soap and water, or use an alcohol-based hand sanitizer. This step can’t be skipped—it’s your last line of defense.
Key Safety Tips for Doffing
Go slow and steady. Rushing increases your risk of errors.
Never touch your face or exposed skin once your gear is on, and keep the outside of the coverall away from your body.
Dispose of your PPE properly and stick to safety protocols.
Clean your hands thoroughly after every doffing session.
Doffing Observers and Error Prevention
In high-risk environments, having a trained doffing observer or buddy system in place is a game-changer. It helps ensure you follow the steps correctly and reduces human error.
Whether you’re working with disposable FR coveralls in welding areas, hooded coveralls in cleanrooms, or paint coveralls in spray booths, the principle stays the same: careful, step-by-step removal keeps you safe and contamination-free.
Common Doffing Mistakes to Avoid
Rushing through it. Don’t speed through the process—take your time.
Touching contaminated surfaces and then touching your skin or clean clothing.
Skipping hand hygiene after removing the coveralls.
Removing gloves before all other protective equipment is off.
Conclusion
The removal process might seem like a hassle, but following these steps carefully will protect you from self-contamination. More importantly, it reduces the chances of carrying hazardous materials into clean areas or even your home. Taking a little extra time to do it right can make all the difference.
Proper Disposal and Handling of Used Disposable Coveralls
Proper disposal of disposable protective coveralls is critical in healthcare, industrial, and research settings. It ensures safety, manages PPE waste, and protects the environment.
Key Steps for Safe Disposal
Assess Contamination: Inspect the disposable protective coverall for exposure to hazardous chemicals, infectious agents, or bodily fluids. If contaminated, treat it as hazardous waste.
Use Appropriate Containers: Place contaminated disposable protective coveralls in sealed, labeled hazardous waste bags. For uncontaminated coveralls, follow local guidelines for regular waste disposal.
Secure and Label Bags: Seal bags tightly and label them clearly to ensure safe handling of disposable protective coveralls by waste management personnel.
Follow Regulations: Adhere to local, regional, and national regulations for disposable protective coverall disposal. Some coveralls, like fr disposable coveralls, may require special collection or incineration due to their flame-resistant properties.
Choose Sustainable Options: Opt for biodegradable or recyclable disposable protective coveralls when possible. After sterilization, some materials can be recycled into insulation or cleaning rags, reducing landfill waste.

Environmental Impact and Compliance
Improper disposal of disposable protective coveralls and fr disposable coveralls can harm the environment and pose public health risks. The surge in PPE waste during COVID-19 highlighted these challenges. Incineration or autoclaving is recommended for hazardous coveralls, while recycling is ideal for safe, uncontaminated materials. This ensures compliance with regulations and promotes sustainable practices.
Additional Tips for Maintaining Safety with Disposable Coveralls
When it comes to working in hazardous environments, wearing the right disposable coveralls is essential for both your safety and comfort. These safety tips will guide you on how to get the most out of your protective gear.
Choose the Right Material for the Hazard
The type of coverall you need depends on the specific hazards you’re dealing with. For example, Morntrip coveralls are known for being breathable and offer splash protection, while others, like micro-porous film laminates, provide stronger defense against chemical splashes. Selecting the right material can mean the difference between safe work and exposure.
Ensure Proper Fit and Inspection
A coverall that’s too tight or too loose won’t protect you properly. Always consult the sizing chart to find a fit that matches your height and chest measurements. Before you put on the coveralls, take a moment to inspect them for any rips or defects. And after each use, double-check for any damage to ensure they’ve remained intact and ready for the next task.
Stay Comfortable During Long Shifts
If you’re in it for the long haul, comfort is key. For extended wear, look for breathable, ventilated designs. Morntrip coveralls, for example, offer elastic waists, cuffs, double-zip closures, and snug hoods—all of which improve comfort without compromising on protection.
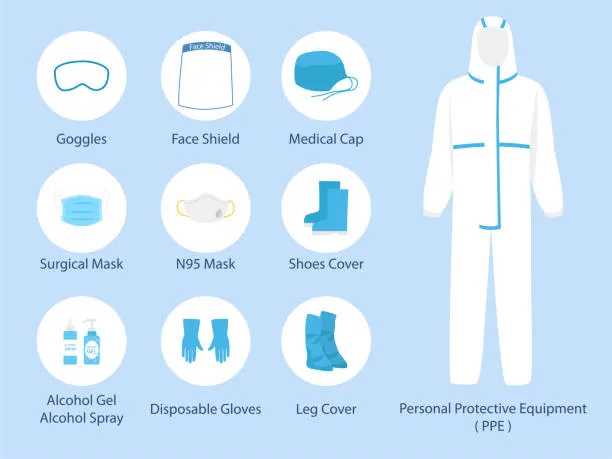
Complement with Full PPE
Disposable coveralls should be paired with the rest of your personal protective equipment ( PPE ). Wear gloves over the cuffs, use disposable boot covers, and don a hairnet to keep everything covered. Don’t forget your goggles for eye protection and respirators for airborne hazards. Together, these elements ensure you're fully protected.
Mastering how to properly put on and remove disposable coveralls isn’t just about following procedures—it’s about keeping yourself, your team, and your workspace safe from preventable risks. With the right size, proper fit, and technique, you’ll stay protected and confident, no matter the environment.
If you’re interested in custom-made disposable coveralls or need a quote, don’t hesitate to contact us for professional assistance and pricing.